Access Control
Door locking and unlocking, and other space access control is achieved through a system called Lenel S2. The headend equipment for the system is located in Room 126 (The IT room). It looks like this:
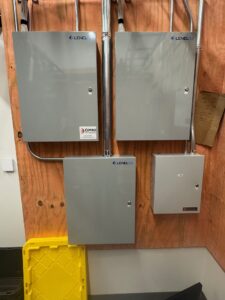
This equipment was installed by Omni Technologies and the warranty period runs through 12/23/24. Any service issues should be handled by contacting them directly. Contact info is located on the Vendors/Contractor page.
The back-end side of the access control consists of two pieces. First is the System Administration, through which keycards can be created for cardholders, door unlocking schedules can be set, etc. The second portion is the Alarm Monitoring part. This can be used to view a live list of card access by cardholder, alarms, unlocked door status, etc.
For security reasons, the goal to have the doors unlocked for the least amount of time possible. While most cardholders have access via any door, only the exterior Door A should be unlocked during normal hours of operation. This is currently set to the following:
-Monday through Friday, 8 a.m. to 5 p.m.
-Saturday, 7 a.m. to 3 p.m.
-Sunday, 9 a.m. to 2:15 p.m.
During these times, the door will remain locked until the first card swipe after the beginning of the above times. This is a security feature that ensures that the exterior door will remain locked if the building is closed for inclement weather, etc.
The interior Door A is only unlocked during specific weekend periods for rehearsal drop-off. This door will automatically unlock based on time, so that is the driver behind exterior Door A changing to unlocked only after the first card swipe. Suppose exterior Door A were to unlock automatically. In that case, it is possible that both exterior and interior Door A would be unlocked for periods on the weekend, even if nobody was in the building. Current interior Door A unlock times are:
-Saturday, 7 a.m. to 7:30 a.m., 9 a.m. to 11 a.m., 11;30 a.m. to 2 p.m., 2:30 p.m. to 3 p.m.
Within the System Administration software lies the ability to implement the programming that controls which doors are locked (or unlocked), during which periods, and who has access to a specific area or areas during those times. The following will explain how to create Timezones, Holidays, Access Levels, and Cardholders.
Creating a Timezone is the first step in granting some form of access to the building. To begin, with System Administration open, go to Access Control>>>Timezones. From there, a current Timezone may be modified or a new one created. To modify an existing Timezone, click on it to highlight it, then scroll down and click the “Modify” button. When finished modifying, click the “OK” button.
To create a new Timezone, scroll down and click “Add“. Give the new Timezone a descriptive name. It is best practice to include the door or doors the Timezone will affect, along with any hours that the Timezone will be in effect. It is possible to include six (6) Intervals under a single Timezone. Each Interval must have a start and end time. Times are entered in 24-hour format, so if the end time is 3 p.m., it is entered as 15:00. Make sure to check any Holidays during which the Timezone will be in effect. (Holidays will be addressed in the next section). Click “OK” to save.
Holidays can be used to either limit or allow access to certain cardholders or groups of cardholders. It is best to illustrate this through an example.
There is a Timezone Example #1 that is M-F, 8 a.m. to 5 p.m. and Timezone Example #2 that is also M-F 8 a.m. to 5 p.m. However, Timezone Example #1 has a Holiday set to only “H1”. This means that the “H1” box is checked for Timezone Example #1. Timezone Example #2 has a Holiday set to only “H2”. Holiday #1 has been set up to run from June 1 through June 30. Holiday #2 has been set up to run from August 1 to August 31. Under this scenario, a cardholder with Timezone Example #1 access would have access M-F, 8-5, except for August. This is because “H2” is not selected for Timezone Example #1. Alternatively, a cardholder with Timezone Example #2 access would have access M-F, 8-5, except for June since “H1” was not selected for Timezone Example #2.
Setting up a Holiday is accomplished by going to Access Control>>>Timezones, then selecting the Holidays tab and clicking “Add“. Give the Holiday a name. This could be something like “Only Timezone Example #1 Access” or another name that could help clarify what the Holiday does. Then select the “Type“. The “Type” is the same as the “H#” designation in a Timezone. “Type” can be renamed by right-clicking on it but this is a global change, not just for this specific Holiday. Select a start date from the calendar and the duration of the Holiday. Click “OK” to save it.
The Timezone/Reader Mode function is accessed via Access Control>>>Timezones, then selecting the Timezone/Reader Mode tab. From this tab, to modify an existing setting, click on the setting then click on “Modify” below. To add a setting, click “Modify“. When adding a new setting, highlight both a Reader and a Timezone from the separate panes on the left. Then choose the “Start Reader Mode“. This is where the “First Card Unlock” function can be activated-use this function judiciously. Also, set the “End Reader Mode“. This would typically get set to “Card Only” so that the reader returns to a state that requires a card swipe to gain access. Once the settings are correct, click the arrow to move the checked reader and timezone from the two left panes to the right pane. Then click “OK“. Again, an example may work best.
There is a Door Reader #1 and a Door Reader #2. There is also a Timezone called “Special Event” That is on Wednesday from 8 a.m. to 9 a.m. Door Reader #1 is selected in the upper pane and Timezone “Special Event” is selected in the lower pane. Start Reader Mode is set to Card Only and First Card Unlock is checked. The End Reader Mode is set to Card Only. The arrow between the panes is clicked to move the setting into the right-hand pane and “OK” is clicked. Next, Door Reader #2 is selected in the top pane, and “Special Event” is selected in the lower pane. Start Reader Mode is set to “Unlock” and End Reader Mode is set to Card Only. The arrow between the panes is clicked to move the setting to the right-hand pane, then “OK” is clicked.
Under this example, on Wednesday morning, Door Reader #2 would automatically unlock at 8 a.m. Door Reader #1 would not unlock until the first card was swiped at or after 8 a.m. Both doors would lock and switch to Card Only Status at 9 a.m. The caution in using this method for a one-time event is that it needs to be removed after it has been executed or it will repeat every week. A better way to handle this is through the System Tree on the Alarm Monitoring side, which will be discussed later.
An Access Level is a combination of Door Readers and Timezones that are assigned to a Cardholder to allow access via a specific door or set of doors during a specific time. This is used to control which employees, guests, or contractors have access to the building, or even areas within the building, and the exact period that access will be granted.
To create an Access Level, go to Access Control>>>Access Levels. Click on the Access Levels tab and then click “Add” at the bottom. Give the Access Level a descriptive name. Note that while multiple Readers can be selected, only a single Timezone can be selected. Select all Readers that the Access Level will use and then select the Timezone for those Readers. (Make sure that there is a red checkmark next to the Reader or Timezone name, or it is not selected.) Click the arrow between the left and right panes to move the selected item into the right pane. Click “OK” to save.
Cardholders are the end users who are being granted access to the building or areas within the building. Each Cardholder is assigned an Access Level which will allow access to a door or set of doors during a specific time frame.
To create a new Cardholder, go to Administration>>>Cardholders. Click the “Add” button at the bottom of the screen. Select the Cardholder tab, enter a Last Name and First Name. For a Badge Type, select Employee unless this is a vendor or renter, then select Temporary. Next, click on the “Badge” tab and enter the number from the physical card into the Badge ID field. Make sure that the “Status” field is set to “Active“. An “Activate” and “Deactivate” date needs to be set. For employees, the Deactivate date can be set 25 years into the future. For Temporary cards, this can be set at the end of the event or access period. Next, click on the “Access Levels” tab. From here, multiple Access Levels can be assigned to the Cardholder. Once “OK” is clicked at the bottom of the screen, the card is set and can be delivered to the Cardholder. It may be advisable to label each card with a last name, especially when issuing multiple cards simultaneously. Cards can be punched for keyring attachment. The areas that can be punched on the card are indicated by three small dots. The hole should be located as close to the dots as possible otherwise it will render the card inoperable.
For lost, broken, or temporary cards, it is necessary to deactivate any cards issued. This applies to terminated and departing employees as well. To accomplish this, go to Administration>>>Cardholders. Click on the “Search” button at the bottom of the window. Enter the Last Name and click “OK”. Click on the “Badge” tab, then click on the correct Badge ID, and then click on “Modify” near the bottom of the window. From here, the Status can be changed. Selecting anything other than “Active” will deactivate the card. Click “OK” to save the changes.
!!!WHETHER SETTING AN UNLOCK PERIOD FOR A SINGLE DOOR OR A GROUP OF DOORS, IT IS NECESSARY TO ALSO SET A RELOCK OR “CARD ONLY” TIME. IF A RELOCK TIME IS NOT SET, THE DOOR(S) WILL REMAIN UNLOCKED INDEFINITELY!!!
There are currently just a couple of purposes served by the Alarm Monitoring function. It can monitor a Zone or Reader, monitor a Badge, or it can also be used to manually lock or unlock a door or doors.
The Zone Monitor has two main functions that will be used frequently. The first is to monitor door activity, alarms, and doors that are not closed. The second is to monitor the activity of a specific Cardholder.
To monitor door activity, with Alarm Monitoring open, click on Trace>>>Monitor Zone. In the popup screen, click on the “Perform Historical Trace” checkbox, and make sure the “Perform Live Trace” checkbox is selected. Select a start and end time, if applicable. Click “OK” and the window should populate with the Main Alarm Monitor which will show events as they happen.
To monitor a Cardholder, the procedure is much the same. To monitor Cardholder activity, with Alarm Monitoring open, click on Trace>>>Badge. In the first popup screen, enter the Badge number that is to be traced and click “OK”. The Badge number can be found by conducting a search in the System Administration panel. In the next popup screen, click on the “Perform Historical Trace” checkbox, and make sure the “Perform Live Trace” checkbox is selected. Select a start and end time, if applicable. Click “OK” and the window should populate with the Badge # Trace Monitor which will show events as they happen.
The System Status Tree provides visibility to the reader devices within the system and can also manually lock or unlock doors. The caveat in this is that once a door is unlocked manually, it will remain unlocked until it is either: 1) relocked manually, or; 2) the next scheduled lock time takes place. This means that a door could effectively be unlocked overnight if it is manually unlocked after the latest automatic locking time.
To change the state of a door, go to View>>>System Status>>>New System Status Window. In the popup window, click the caret next to WYSO ISC to expand the view. Right-click on the Reader to be altered. In the new window, go to Reader Access Modes and select either Card Only, Locked, or Unlocked. Card Only mode allows doors to be unlocked with cards having the correct credentials. Locked will lock doors so that they may only be opened with a key. Unlocked, of course, means that they are open and will only lock by manually changing the Reader Access Mode to Locked or when the next automatic locking time occurs.