Room Schedulers
Our system utilizes Extron Room Schedulers in conjunction with Google Calendar. This is a brief overview of that system:
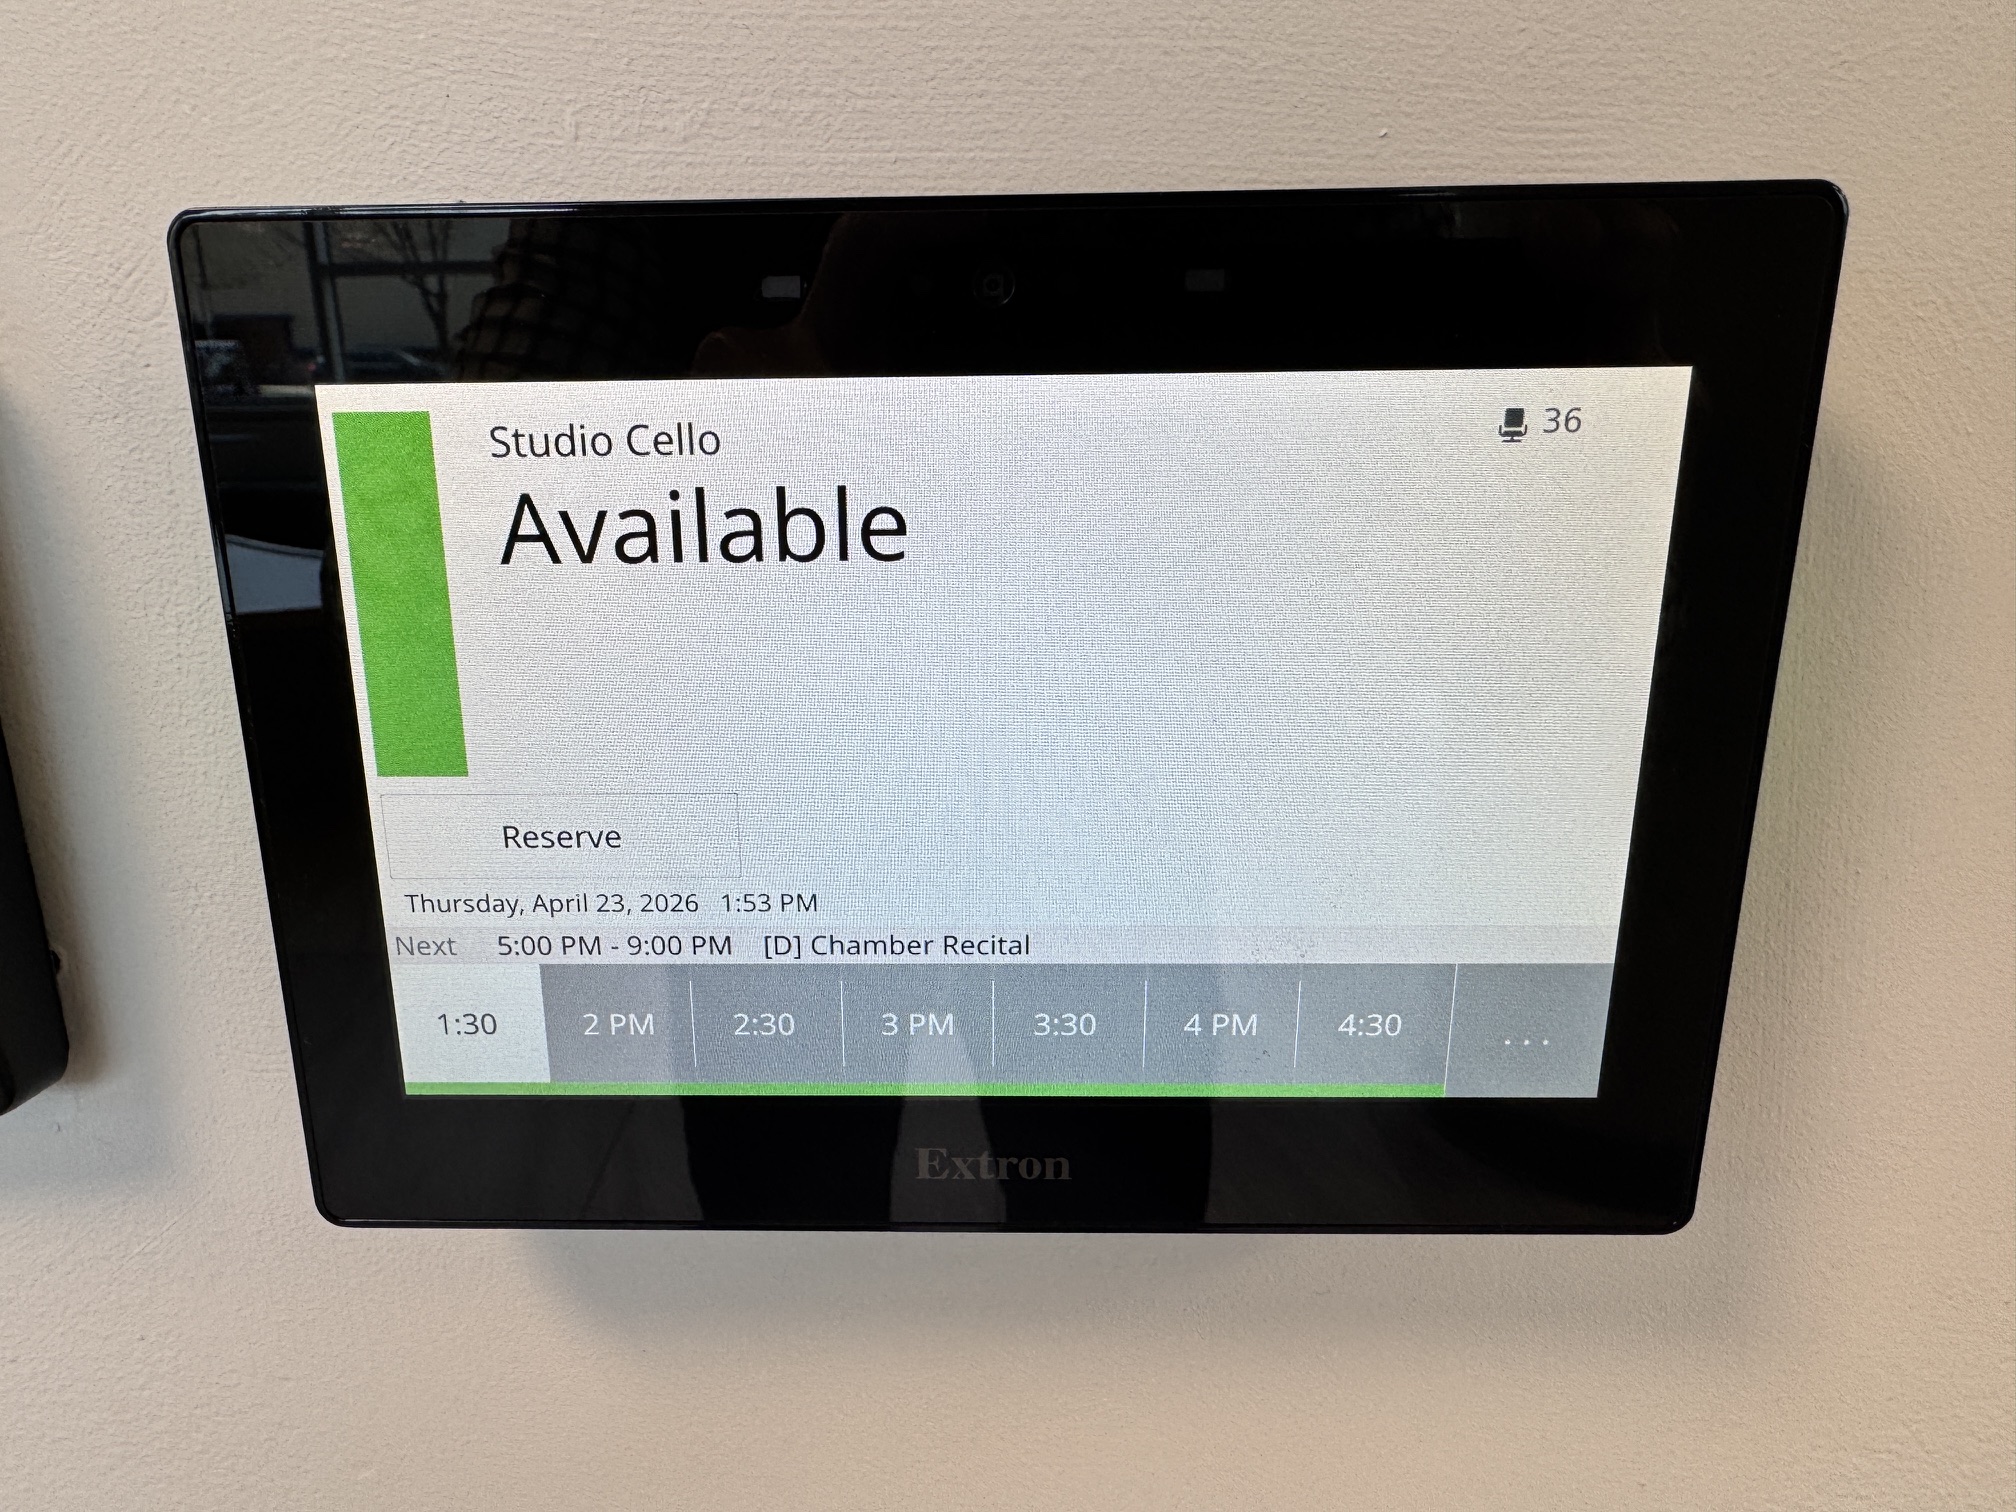
Extron Room Scheduling provides a streamlined, standalone solution for managing meeting spaces without the need for additional intermediate servers or complex programming. By integrating directly with Google Calendar, these touchpanels transform into dedicated booking appliances that stay in perfect sync with your organization’s digital schedule.
System Overview: How it Works
The system is built on a “client-server” model where the TouchLink Scheduling (TLS) panel acts as a direct client to your Google Calendar resource.
- Direct Integration: Panels connect directly to Google Calendar using OAuth 2.0 authentication for secure communication.
- Bi-Directional Sync: When a user books a room via their computer or mobile device, the panel updates instantly. Conversely, a meeting booked directly on the panel “ad-hoc” is immediately pushed to the Google Calendar.
- Visual Indicators: Most TLS panels feature bright, wrap-around LED light bars that glow green when a room is available and red when it is occupied, making status visible from a distance.
- No Recurring Fees: Unlike many competitors, Extron’s solution requires no annual subscription or per-device licensing fees.
Key Features for Users
- One-Tap Booking: Users can reserve an available room immediately by tapping the “Reserve” button on the screen.
- Check-In Functionality: A “Check-In” button confirms attendance; if not pressed within a set timeframe, the room can be automatically released back to the pool.
- QR Code Support: Users can scan a QR code on the panel with their mobile device to reserve, extend, or release meetings without touching the screen.
- Meeting Details: The interface displays the current meeting name, organizer, and a timeline of the day’s upcoming events.
Setting Up the System
Configuration is handled through Extron’s free Room Agent™ software, which simplifies the process into a few logical steps.
Phase 1: Google Workspace Preparation
Before configuring the hardware, an administrator must set up the room resources in the Google Admin console.
- Create Resources: In the Google Admin panel, navigate to Buildings and Resources and add your conference rooms as individual resource calendars.
- Authentication: Ensure you have the credentials for a Google account with “Super Admin” or delegated access to these resources to authorize the panels via OAuth 2.0.
Phase 2: Hardware Configuration (Room Agent)
- Connect: Link your TLS touchpanel to your computer or network.
- Define Server: Open Room Agent and select Google Calendar as your mail server type.
- Link Resource: Enter the specific Google Resource Email address for that room.
- Customize UI: Use the software to upload your company logo, choose between light/dark themes, and select which information fields (like meeting organizer or subject) should be visible.
- Deploy: “Push” the configuration to the panel. The device will reboot and begin displaying the live schedule.
Optional Enhancements
- Occupancy Sensors: You can connect Extron OCS 100 series sensors to the panel’s digital input. These automatically release the room if no motion is detected after a specified time.
- Wayfinding: For lobbies, the TLSI 201 Interactive Wayfinding Interface can aggregate data from multiple panels to show a building-wide map of room availability.